Subscribe to RSS Feed

Firebug 1.7 (currently beta 1 available) improves API related to Infotips. These Infotips are used in Firebug UI for displaying additional information.

They are similar to tooltips but can provide a richer content (comparing to those in HTML). The content doesn't have to be only a text but any HTML. In fact, the content is usually generated using Domplate.

Let's see how to utilize these Infotips in Firebug extensions.

Infotip in Firebug UI

First, see how infotips actually look like. Since they are implemented in HTML and Firebug uses HTML only for panel content (so far) they appear in panels.

The first image comes from the Script panel. The mouse is hovering over a variable and the infotip shows its value.

The next infotip is displayed within the Net panel. It shows detailed timing info for selected (note the gray background) HTTP request entry.

And the last example shows preview of an image when the user hovers mouse over a CSS property with background URL.

Read more...

Firebug inspector is certainly one of the most valuable Firebug features and it also deserves more attention from extension developers. From this reason Firebug 1.7a10 introduces a new API that allows reusing this feature in Firebug extensions and customize its behavior.

This part of Firebug extension tutorial explains how to use this API in Firebug extensions.

Firebug Inspector

Let's see a quick overview of what is actually the Firebug inspector and how it works from the user perspective.

  • Clicking on the inspector button starts an inspecting mode.
  • As the user moves the mouse cursor over page elements, they are automatically highlighted.
  • The HTML panel (selected by default) shows detailed information about the currently highlighted element.
  • The inspecting mode can finished by clicking on the inspecting page element or canceled by pressing ESC key.

Read more...

It's been a while since I published the last part of my Extending Firebug Tutorial and it looks like it's time to continue.

I have been inspired by an interesting thread started recently on Firebug newsgroups and I decided to write a part related to Firebug Activable Panels and Modules.

The activation support is useful in cases when the user doesn't need specific Firebug features and disables them in order to avoid performance penalties. A simple example can be a web designer that doesn't need JavaScript debugger and so, keeps the Script panel disabled.

Disabled Script panel

There are two ways how to enable (or disable) a panel. The first option is to use the mini tab menu available next to the panel's label.

Disabled Script panel

Notice that all panel related options (if any) will be displayed underneath of these two menu items (see, how to provide such options in part III.)

The second possibility is to use the status bar icon menu (be careful this UI will most likely change in Firefox 4.0).

Disabled Script panel

So, if you are a Firebug/Extension developer read more about activable APIs and how to create an extension with an activation support.

Read more...

Since fresh new Firebug 1.4a13 - the Net panel introduces, among other things, several new events that allow to easily collect all network requests and also related info gathered and computed by Firebug.

This functionality should be useful also in cases where Firebug extensions want to store network activity info into a local database or send it back to the server for further analysis (I am thinking about performance statistics here).

So, if you are interested to see a simple example that shows how a listener should be implemented and registered within the Net panel read more.

Read more...

One of the new features introduced since Firebug 1.4a2 is possibility to extend Net panel with additional info. There are new APIs that allow to create a custom info-tab for network requests (like Headers, Params, etc.) from within a Firebug extensions.

This post is intended (a) to show how these APIs should be properly used by Firebug's extensions and also (b) to gather some feedback about the architecture.

So, let me know please, if there is something I haven't thought about when designing this new extension point.

Custom info tab for network request.

Read more...

Even if this part is also about web services integration, the main purpose is actually to show another (and a bit more complex) example of Domplate usage. In this part I have used Yahoo! Search Web Services to track inbound links and demonstrate how Domplate can be used together with real data. Final extension in this part will discover what pages link to the current page in the browser.
Read more...

One of the most interesting parts of the Firebug framework is a template system called Domplate. This engine is used to generate HTML UI of Firebug (content of all FB's panels).

It's quite powerful template system and I would definitely recommend to use it when creating UI for Firebug extensions.

Domplate generates the result HTML markup according to templates written in JavaScript. These templates are internally evaluated into a text, which is consequently inserted into specified DOM element on the page through innerHTML property.

It's also possible to define DOM event listeners so, the template object can handle even the user interaction with the final UI.

Hello World! template

So, let's take a look at how to make up some HTML for our Hello World! extension. First of all, see the following piece of code that defines a simple Domplate template.

var helloWorldRep = domplate(
{
    myTag:
        DIV({class: "MyDiv"},
            "Hello World!"
        )
});

HTML generated from this template should look like as follows:

<DIV class="MyDiv">Hello World!</DIV>

The template object is created by domplate function and stored in helloWorldRep variable. This new object usually contains three type of properties:

  1. Tag - set of functions (constructors) that represent a markup template.
  2. Data provider - a function that is intended to provide dynamic data for the template during generation process.
  3. Event handler - a function that is intended to handle DOM events fired when the generated UI is used by the user.

In our case, we have only one tag that describes how the result markup should look like. Only static text will be generated so, no additional providers or handlers are necessary.

The next piece of code shows how to evaluate the template and append generated HTML into our panel. It's executed within onMyButton function, which is a handler for a toolbar button created in part II.

onMyButton: function(context)
{
    var panel = context.getPanel(panelName);
    var parentNode = panel.panelNode;
    var rootTemplateElement = helloWorldRep.myTag.append(
        {}, parentNode, helloWorldRep);
}

We are using panel's member variable panelNode, which represents content area of the panel - final HTML will be inserted into it. Notice that we are using getPanel function to get our panel for the current context (page) where panelName represents ID of the panel, see part II.

HTML is inserted into the panel by calling append method of the template tag. This method has three parameters. The first one is used to provide data for the template, it's just empty object in our case as there are no dynamic properties in our template. The second is the parent DOM node and the last represents context object (this) that contains callback methods (data providers and event handlers). It can be null in our case as we don't have any callbacks yet, but it's good practice to use the template itself. It's usually the template which defines all these callbacks. Return value is root element of the created DOM (we don't need it for now).

In order to test the example just press Say Hello toolbar button (multiple times). Following screenshot shows how the output should look like.

Dynamic template

Let's make our template a bit more complicated and see how to (a) use dynamic properties, (b) localize the message and (c) use an event listener.

var helloWorldRep = domplate(
{
    myTag:
        DIV({class: "MyDiv", onclick: "$onClick"},
            SPAN($HW_STR("helloworld.message")),
            SPAN(" "),
            SPAN("$date")
        ),

    onClick: function(event)
    {
        alert("Hello World!");
    }
});

The templates uses a dynamic property date so, don't forget to provide the actual value when inserting the template output into the page.

onMyButton: function(context)
{
    var panel = context.getPanel(panelName);
    var args = {
        date: (new Date()).toGMTString()
    };
    var root = helloWorldRep.myTag.append(args, panel.panelNode, null);
},

Generated markup should look as follows:

<DIV class="MyDiv">
    <SPAN>Hello World!</SPAN>
    <SPAN> </SPAN>
    <SPAN>Wed, 04 Jun 2008 11:06:28 GMT</SPAN>
</DIV>

$date represents an expression that looks for a property named date within provided args object. The onclick: "$onClick" statement looks for a method named onClick within the provided args object and if it's not there it looks within context object (the third parameter of the append method). Finally, the Hello World! message is localized using our $HW_STR method that comes from part IV.

Example extension (helloworld-0.0.5.xpi) can be downloaded here.

Domplate & JQuery

Entire engine is completely independent of the rest of Firebug API and so, it can be also easily used individually (e.g. within a web page). There is already some activity in this area. Christoph Dorn (creator of FirePHP) wrapped it into a jquery plugin. You can download it here.

I have already mentioned a few times that we'll take a look at how to properly localize our extension. Even if the process is nothing new for experienced extension programmers, I think it should be part of this tutorial.

First of all, let's extend our directory structure. We'll need a new place where to put localized strings.

helloworld@janodvarko.cz/
    chrome/
        content/
            helloworld/
                helloWorld.xul
                helloWorld.js
        locale/
            en-US/
                helloWorld.dtd
                helloWorld.properties
    defaults/
        preferences/
            prefs.js
    chrome.manifest
    install.rdf

There are two new files: helloWorld.dtd contains entities that are used to localize strings contained in XUL files and helloWorld.properies is used to localize strings in JavaScript code.

To let Firefox know about these files, we need to modify our chrome.manifest file and append following line to it.

locale  helloworld  en-US       chrome/locale/en-US/

Localizing strings in XUL files

All strings in our helloWorld.xul are localized using helloWorld.dtd locale file. This DTD file contains list of entities with corresponding localized strings. In our extension we have to localize just a toolbar button. So, we need two following entities defined in it.

<!ENTITY  helloworld.mybutton.label         "Say Hello">
<!ENTITY  helloworld.mybutton.tooltip       "Push to say hello">

In order to use these entities within the helloWorld.xul file we have to create a reference to the locale file.

<!DOCTYPE helloworldDTD SYSTEM "chrome://helloworld/locale/helloWorld.dtd">

Sometimes you need to reference multiple DTDs from single XUL file. Here is an article that explains how to do it.

Now, we have to replace the strings by the entities that comes from the locale file. Following source code shows how the toolbar button definition looks after the replacement (see label and tooltiptext attributes).

<toolbarbutton id="hwMyButton"
    class="toolbar-text-button"
    label="&amp;helloworld.mybutton.label;"
    tooltiptext="&amp;helloworld.mybutton.tooltip;"
    command="cmd_hwMyButton"/>

Localizing strings in JavaScript code

There is also a few strings in our JavaScript code that must be localized as well. We'll do it by using a standard string bundle that gets the strings from helloWorld.properties file (see more about property files). This file contains following set of strings (name=value pairs).

helloworld.option1=Option1
helloworld.option2=Option2
helloworld.paneltitle=Hello World!
helloworld.message=Hello World!

Now, when we have the property file ready, we need to create a string bundle. There are two ways how this can be done. We can use nsIStringBundleService and read the property file in JavaScript.

var src="chrome://helloworld/locale/helloWorld.properties";
var localeService =
    Components.classes["@mozilla.org/intl/nslocaleservice;1"]
    .getService(Components.interfaces.nsILocaleService);
var appLocale = localeService.GetApplicationLocale();
var stringBundleService =
    Components.classes["@mozilla.org/intl/stringbundle;1"]
    .getService(Components.interfaces.nsIStringBundleService);
var bundle = stringBundleService.CreateBundle(src, appLocale);

See chapter 11. Localization from Creating Application with Mozilla book for more information about string bundles.

The other way is to define the bundle in helloWorld.xul, using stringbundleset and stringbundle elements. This method is simpler and used in our extension.

<stringbundleset id="stringbundleset">
    <stringbundle id="strings_helloWorld"
        src="chrome://helloworld/locale/helloWorld.properties"/>

</stringbundleset>

As soon as the string bundle is ready we have to make sure the JavaScript code loads every string from it instead of using just literal strings. In order to make things a bit easier we'll define two helper functions that load a given string from the string bundle and returns its localized value.

function $HW_STR(name)
{
    return document.getElementById("strings_helloWorld").getString(name);
}

function $HW_STRF(name, args)
{
    return document.getElementById("strings_helloWorld")
        .getFormattedString(name, args);
}

Following source code shows how the $HW_STR method is used to localize Options menu items defined in the previous part.

getOptionsMenuItems: function(context)
{
    return [
        this.optionMenu($HW_STR("helloworld.option1"),
            "helloworld.option1"),
        "-",
        this.optionMenu($HW_STR("helloworld.option2"),
            "helloworld.option2")
    ];
}

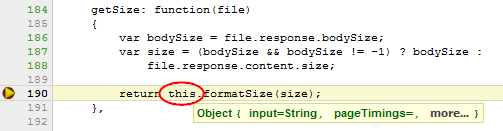
If you need to put some dynamic values into the localized string use the $HW_STRF method. This method takes an extra parameter - array of arguments, which are substituted into the string in the bundle. See the following example how to use it.

Here is a localized string with placeholders where dynamic data should be inserted:

helloworld.formattedstring=Here is a value: %S and here is another: %S.

And here is the piece of JavaScript that loads the string:

var localizedString = $HW_STRF("helloworld.formattedstring",
    ["value 1", "value 2"]);

If you are interested in more details how to properly localize Firefox extensions, read this article.

Example extension (helloworld-0.0.4.xpi) can be downloaded here.

I have finally got some time to write another piece of the tutorial. This time I’ll explain how to use an Options menu that is available in every Firebug’s panel. This menu is located at the right side of a tab-bar.

See an example of Console Options menu from Firebug 1.1

The main purpose of the menu (as the name clearly indicates) is to expose panel-specific options (preferences), so the user can access them and change theirs value if necessary.

Simple example

The menu is already built within Firbug’s UI. So, all we have to do is to provide a content. This is done by getOptionsMenuItems method that must be implemented in the specific panel object (i.e. HelloWorldPanel in our case).

function HelloWorldPanel() {}
HelloWorldPanel.prototype = extend(Firebug.Panel,
{
    // . . .
    getOptionsMenuItems: function(context)    {
        return [{
            label: "My Menu Item",
            nol10n: true,
            type: "checkbox",
            command: function() { alert("Hello from the Options menu!"); }
        }];
    }
});

This method is called by the framework when the user clicks on the Options menu - just before it’s displayed. Each object returned in the array represents a menu-item. Following properties are supported.

label (string) The label that will appear on the menu item.
nol10n (boolean) Indicates whether the label should be localized. *)
type
Specifies type of the menu.
checked (boolean) Indicates whether the element is checked or not.
disabled (boolean) Indicates whether the element is disabled or not.
image (image URL) The URL of the image to appear on the menu item.
command (js-function) java script menu item handler.

*) This is only for strings coming from firebug.properties file. Should be always set to true for third party strings.

Real options

Let’s develop more useful example that uses the menu for real options (preferences). First of all, we’ll define default preferences ...

pref("extensions.firebug.helloworld.option1", true);
pref("extensions.firebug.helloworld.option2", false);

... and put them into a prefs.js file, which is located at proper location within extension's directory structure.

helloworld@janodvarko.cz/
    chrome/
        content/
            helloworld/
                helloWorld.xul
                helloWorld.js
    defaults/
        preferences/
            prefs.js
    chrome.manifest
    install.rdf

Now, see new implementation of the getOptionsMenuItems method, which displays both new preferences and makes possible to change theirs values.

function HelloWorldPanel() {}
HelloWorldPanel.prototype = extend(Firebug.Panel,
{
    // . . .
    getOptionsMenuItems: function(context)
    {
        return [
            this.optionMenu("Option1", "helloworld.option1"),
            "-",
            this.optionMenu("Option2", "helloworld.option2")
        ];
    },

    optionMenu: function(label, option)
    {
        var value = Firebug.getPref(Firebug.prefDomain, option);
        return {
            label: label,
            nol10n: true,
            type: "checkbox",
            checked: value,
            command: bindFixed(Firebug.setPref, this, Firebug.prefDomain, option, !value)
        };
    }
});

As you can see, there is a new helper method optionMenu that creates a menu-item object. The method takes two parameters: a label and a preference name.

Notice that menu-item-separator is created just with simple "-" string.

The most interesting thing is probably the implementation of optionMenu method. First of all, we are utilizing get & setPref methods from Firebug namespace:

Firebug.getPref(prefDomain, name);
Firebug.setPref(prefDomain, name, value);

This example considers Firebug 1.2 (these methods are different in 1.1).

The usage is quite obvious. The first parameter is used to specify preference domain, the second specifies preference name and the third - new preference value. The domain should be "extensions.firebug" (there is a constant Firebug.prefDomain for that).

Further, there is a new bindFixed method. Could sound familiar to you as this pattern is often used in JS libraries (e.g. Prototype). In this example, bindFixed is used to bind a method (Firebug.setPref) to a handler (command), with three parameters (Firebug.prefDomain, option, !value).

The source code is worth a thousands words, so here is how the method looks like:

Firebug.bindFixed = function()
{
    var args = cloneArray(arguments), fn = args.shift(), object = args.shift();
    return function() { return fn.apply(object, args); }
};

Finally, if you want to test it, don't forget to open the about:config page in order to see how the preference is changing.

The extension can be downloaded here (you need Firebug 1.2 ).

Next step in this tutorial is intended to show how a new button can be created within Firebug's toolbar. This part will demonstrate two things (a) how to create a new button that is associated with our "Hello World!" panel and (b) how to append a new button to an existing panel (it'll be the Net panel that is used to monitor network activities). There is also some info about a Model, which is important part of a Firebug extension.

Create button for Hello World! panel

In order to append a new button to our panel, the HelloWorld.xul file has to be modified. This file represents the FB overlay and has been introduced in the previous part.

<?xml version="1.0"?><overlay xmlns="http://www.mozilla.org/keymaster/gatekeeper/there.is.only.xul">
    <script src="chrome://helloworld/content/helloWorld.js" type="application/x-javascript"/>

    <commandset id="mainCommandSet">
        <command id="cmd_hwMyButton" oncommand="Firebug.HelloWorldModel.onMyButton(FirebugContext)"/>
    </commandset>

    <toolbar id="fbToolbar" align="center">
        <hbox id="fbToolbarInner" insertbefore="fbDetachButton" flex="1" align="center">
            <hbox id="fbHelloWorldButtons" insertafter="fbNetButtons">
                <toolbarseparator/>
                <toolbarbutton id="hwMyButton"
                    label="Say Hello" class="toolbar-text-button"
                    tooltiptext="Push to say hello" command="cmd_hwMyButton"/>

           </hbox>
       </hbox>
    </toolbar>
</overlay>

This code inserts new button at appropriate location within the Firebug's UI. Notice that our hwMyButton button uses command cmd_hwMyButton that is consequently associated with following javascript method.

Firebug.HelloWorldModel.onMyButton(FirebugContext)

There is a few new things to explain, but let's take a look at the source code first.

FBL.ns(function() { with (FBL) {
var panelName = "HelloWorld";
Firebug.HelloWorldModel = extend(Firebug.Module,
{
    showPanel: function(browser, panel) {
        var isHwPanel = panel &amp;&amp; panel.name == panelName;
        var hwButtons = browser.chrome.$("fbHelloWorldButtons");
        collapse(hwButtons, !isHwPanel);
    },

    onMyButton: function(context) {
        alert("Hello World!");
    }
});

function HelloWorldPanel() {}
HelloWorldPanel.prototype = extend(Firebug.Panel,
{
    name: panelName,
    title: "Hello World!",

    initialize: function() {
        Firebug.Panel.initialize.apply(this, arguments);
    }
});

Firebug.registerModule(Firebug.HelloWorldModel);
Firebug.registerPanel(HelloWorldPanel);

}});

First of all, there is a new object called HelloWorldModel. This object is derived from internal Model object and represents data model of the extension. Similarly to the Panel, the Model has to be registered within a global Firebug object.

From the MVC perspective the model could be seen as an entity representing a model and a controller at once - it can be used as a data container and handle some user actions at the same time. Important thing is that there is only one instance of the HelloWorldModel object per Firefox main window (browser.xul), which makes possible to share data among web pages within the same browser window.

There is even another object called Context (can be also interpreted as a data model). Every page with enabled Firebug has it's own instance of this object and it's used to store data associated with the page. You'll see that this object is passed as a parameter to many functions.

See the following UML diagram that depicts described relations.

Panel, Model and Context relations

It's not pure UML as in context of JavaScript there are no real classes and "Browser Window" and "Web pages" are just placeholders here (so I hope UML experts will forgive me ;-) , but following should be obvious from it:

  • The Model object should be used for data shared among pages within the same browser window.
  • The Context object should be used for data associated with a web page.
  • The Panel object should be used to store presentation data (i.e. HTML)

Just to notice, that Panel has a reference to the Context object, which is set in initialize() method. This is why the predecessor method must be called.

The last important thing in this example is showPanel method.

    showPanel: function(browser, panel) {
        var isHwPanel = panel &amp;&amp; panel.name == panelName;
        var hwButtons = browser.chrome.$("fbHelloWorldButtons");
        collapse(hwButtons, !isHwPanel);
    },

This method is executed by Firebug's framework whenever a panel is displayed. This is the right place where to decide whether our set of buttons (identified as fbHelloWorldButtons) should be displayed or not. The first parameter browser - represents browser window (browser.xul) and the second parameter panel - the panel being activated. According to the panelName we can decide whether to collapse (hide) our button(s).

Notice that the collapse method comes from FBL namespace (about namespaces later).

The button should look like as follows.

A new button for Hello World! panel

Create button for an existing panel

Finally, let's take a look at how to overlay an existing set of buttons. This should be simple task now, see the modified helloWorld.xul overlay.

<?xml version="1.0"?>

<overlay xmlns="http://www.mozilla.org/keymaster/gatekeeper/there.is.only.xul">
    <script src="chrome://helloworld/content/helloWorld.js" type="application/x-javascript"/>

    <commandset id="mainCommandSet">
        <command id="cmd_hwMyButton" oncommand="Firebug.HelloWorldModel.onMyButton(FirebugContext)"/>
        <command id="cmd_hwDisableNetMonitoring"
            oncommand="Firebug.HelloWorldModel.onDisableNetMonitoring(FirebugContext)"/>

        </commandset>

    <toolbar id="fbToolbar" align="center">
        <hbox id="fbToolbarInner" insertbefore="fbDetachButton" flex="1" align="center">

            <hbox id="fbNetButtons">
                <toolbarseparator/>
                <toolbarbutton id="hwDisableNetMonitor"
                    label="Disable Net Monitoring" class="toolbar-text-button" type="checkbox"
                    tooltiptext="Press To Disable Network Monitoring"
                    command="cmd_hwDisableNetMonitoring"/>

            </hbox>

            <hbox id="fbHelloWorldButtons" insertafter="fbNetButtons">
                <toolbarseparator/>
                <toolbarbutton id="hwMyButton"
                    label="Say Hello" class="toolbar-text-button"
                    tooltiptext="Push to say hello" command="cmd_hwMyButton"/>

            </hbox>
        </hbox>
    </toolbar>
</overlay>

There is new overlay for fbNetButtons, which is identifier of an existing set of buttons (for the Net panel). And of course, appropriate javascript handler. So, a method has to be appended to the HelloWorldModel object.

Firebug.HelloWorldModel = extend(Firebug.Module,
{
    // . . .

    onDisableNetMonitoring: function(context) {
        alert("OK, the click is handled");
    }
});

And this is how it should look like.

A new button for Net panel

The extension can be downloaded here.

Update: the example extension uses FirebugContext global variable that has been replaced by Firebug.currentContext in Firebug 1.6+. So, make sure to use the correct one when building an extension for Firebug. See also this thread

Next Page »